Dr. Z – greetings from the Midwest! And I need to ask you about radiation shielding, in particular, how to design a radiation shield Can you help me figure out what I need to do? I’m RSO for a small company that wants to get a few more small radioactive sources (in addition to our soil density gauge) and a small x-ray machine for QA testing. Thank you!
So…for a few low-activity radioactive sources we can take what I’ll call an empirical approach – make some dose rate measurements, adjust the shielding if necessary, make more measurements, and adjust the shielding again – keep repeating this until you have radiation dose rates inside and outside the room that you’re happy with. Your adjustments can consist of adding additional shielding (this can be sheets of lead, but it can also be sheets of steel, a layer of brick or cinderblock, a few inches of concrete wall, or anything else that you can put between the source and the people), relocating your sources to a different part of the room, putting them into a safe, or any combination of those. For low-activity sources it usually only takes a few iterations (if that), which will take less time than doing shielding calculations and will cost less than hiring a consultant. And remember – the goal of this is not to reduce dose rates to zero, although that might be the end result, the goal is to reduce dose rates to the point at which you’re compliant with your regulatory requirements. So let’s start with what the regs require.
Your regulations will have three requirements that are relevant to storing and shielding your sources:
- First, no member of the public can have unrestricted access to any location where they could receive a dose of 2 mrem or more in one hour.
- Second, nobody who’s not a radiation worker is allowed to receive more than 100 mrem in one year.
- Third, none of your radiation workers can receive more than 5000 mrem in one year.
But what’s that mean as far as designing shielding for your x-ray and/or source storage room? Let’s start off with seeing if you even need to install shielding at all, and we’ll go from there.
We’ll begin with your sources. The company you’re buying them from has to ship them in accordance with transportation regulations, which means that they need to make sure that radiation levels on the outside of the package and at a distance of 1 meter aren’t too high. So if the sources you’ve ordered are relatively low-activity, the lead shielding they’re shipped in (called a pig) will be sufficient to keep dose rates less than 2 mrem/hr on the outside of the pig. So for the source, you should start by simply measuring radiation levels on contact with the outside of the package and on the outside of the pig when you open the box.
- If dose rate on the outside of the pig is less than 2 mR/hr, put the pig next to the box your soil density gauge is stored in, and measure the dose rate about a foot away – if the dose rate from both is less than 2 mR/hr then you don’t to shield the sources and any of your workers can enter the room.
- On the other hand, if the combined dose rate is higher than 2 mR/hr, you have a few options:
- Move the new sources about 5-10 feet away from the soil gauge and check to make sure radiation levels are less than 2 mR/hr.
- Buy a sturdy safe (gun safes are great for this) to hold both your sources and your soil gauge – the metal in the safe will provide shielding, in addition to the shielding provided by the pig and the soil gauge, and should reduce radiation levels inside the room to acceptable levels.
- As long as dose rates in the room are lower than 2 mR/hr you don’t need to worry about controlling access to the room, or worrying at all about radiation levels outside the room. Having said that, the sources need to be locked up – inside a safe will work (if you get a safe), but locking the entire room is always a good idea; sources and soil gauges are expensive, and you really don’t want to have to explain to your regulators why your sources were lost or stolen.
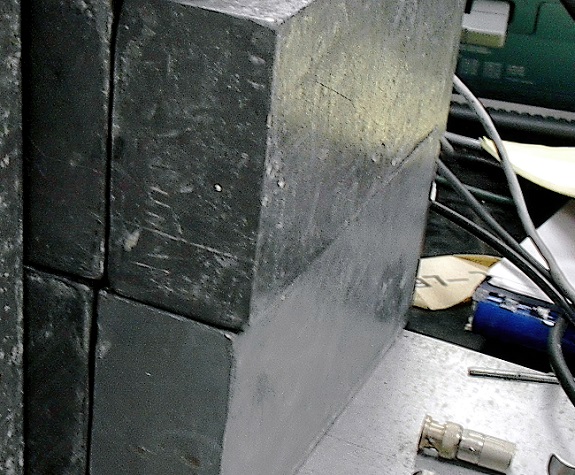
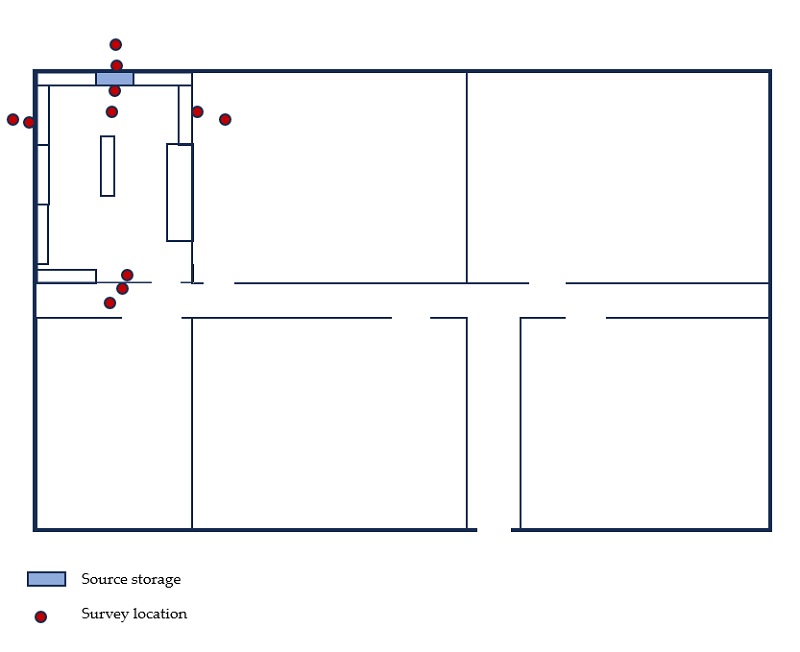
So – now you’re happy with radiation levels inside the room where you’re storing your sources and it’s time to check outside the room. To do this, start by making some dose rate measurements outside the room, preferably holding your detector on contact with the wall, as close as possible to where the sources are stored inside the room – at locations similar to those shown in the figure here. As much as possible, try to take a reading on contact with the surface of the wall (or the safe) and a second reading one foot from the surface.
If the dose rates in all of the rooms outside of the source storage room and on any exterior walls are all less than 0.05 mR/hr (or 50 microR/hr) you don’t need to do anything else – at that level of exposure, even a non-radiation worker won’t be able to exceed an annual dose limit, even if they spend all their time in the room. If dose rates are higher than that then you’ll need to calculate radiation exposure to people in the room, using the amount of time they spend in that room.
As one example, if the dose rate is, say, 0.2 mR/hr in a room that’s occupied 5% of the time (about a half-hour daily…perhaps it’s a restroom) then a person would receive 20 mrem annually from radiation in that room (0.2 mR/hr x 2000 working hours in one year x 5% occupancy = 20 mR in one year). In the drawing here, the only other place where a worker can be exposed to radiation is in the hallway, which will also have a low occupancy factor and is even further from the source storage area; since the total dose will be lower than 100 mrem in a year, your sources are adequately shielded and your work is done! Now, just document your measurements and your calculations to show your regulators and you don’t need to worry about shielding again, unless you get additional sources.
For the x-ray machine it’s actually fairly easy – industrial x-ray machines are usually designed to be used in unshielded rooms. If your company hasn’t already purchased a machine, I’d recommend that you tell the people making the purchase that, all things being equal, it will be better for your company to purchase a shielded machine that’s designed to be used in an open area; if your argument falls on deaf ears, contact the manufacturer and ask if they have any standard shielding designs or recommendations that can be adapted to your facility. Most manufacturers are happy to provide information that makes it easier for you to buy their product. Once installed, whether the device is shielded or is placed within a shielded enclosure, you’ll need to fire it up and measure radiation levels outside the device or outside the room it’s in – something you’ll need to repeat (and document!) at least every 6 months.
Finally – a cautionary tale. Some time back I was asked to consult on a radiation injury lawsuit – an electrician who worked near a company’s industrial x-ray machine developed (and later died of) cancer that he blamed on the machine he worked near. One of my tasks was to evaluate the quality of the company’s radiation safety program; when my report was completed the company decided to settle out of court. They had a lot of problems with their radiation safety program, including that they had virtually no records of anything – no training records, no dosimetry records, no instrument calibration records, and (most importantly), no records of any radiation surveys near the x-ray machine. It’s highly unlikely that the worker received enough radiation to have made him sick – but with no records of any radiation surveys the company had no way to prove it. They ended up settling the case out of court. The moral of the story is that you need to document your radiation surveys, and everything else you do for your radiation safety program; if you don’t have a written record then you don’t get credit for having surveyed.
So – to wrap up, I know you asked about radiation shielding and I got into a lot more than that – transportation requirements, regulatory dose limits, occupancy factors, and more. The thing is, you need to get into all of this in order to know how much shielding you’re going to need in your source storage area. You’ll also notice that I didn’t jot down a single equation and the only calculation performed was one that most middle-school students can handle. This particular problem doesn’t call for any of that, primarily because it’s a lot faster to just play around with pigs, safes, even cinderblock or bricks if necessary. Solving the problem empirically is faster than digging up and plugging your way through the equations and it’s cheaper than buying specialized software or hiring a consultant.
And finally – your example is a simple one; if you’re faced with a complicated problem (for a nuclear pharmacy, a panoramic irradiator, particle accelerators, neutron sources (or anything that produces neutrons) or any other complex situation then you really ought to hire a consultant to do the calculations for you. I’ve designed radiation shields for a fairly large number of clients over the years and even I don’t know enough to tackle a complicated shielding design.
Good luck!